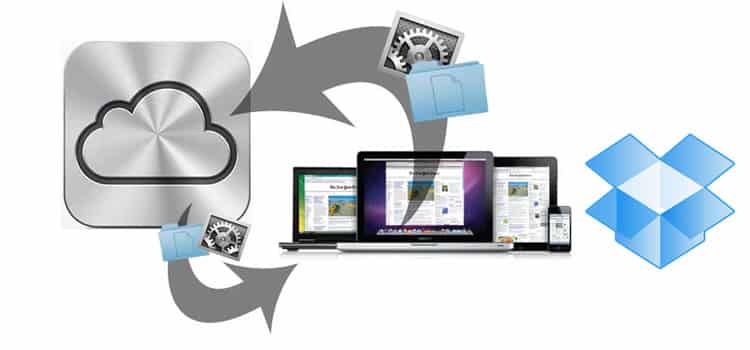
A lot of users are using Dropbox cloud services these days and I am sure that 90% of people who are reading this article also does the same. Dropbox is phenomenal but one thing most of us don’t actually like is its pricing because you will need to upgrade your account which is not quite cheap. Of course there are some options for you to rise that limit for free but eventually you will fill it again. If we look on the other side of the road, iCloud service offer 5GB storage for free user and has much lower prices if you are planning to upgrade to Pro user. The one thing iCloud does not allow their user is to use it any way you want to and its manly designed to work as service for app data syncing.
If you want to bypass this iCloud limitation and use it for more than just app syncing, this tutorial will show you how to turn your iCloud account into external synchronization solution, almost the same you have at Dropbox, which will work on all your Macs allowing you to sync documents or any other media files.
Step 1: On your Mac computer, install and set up iCloud app. If you don’t have iCloud installation file you can find it here.
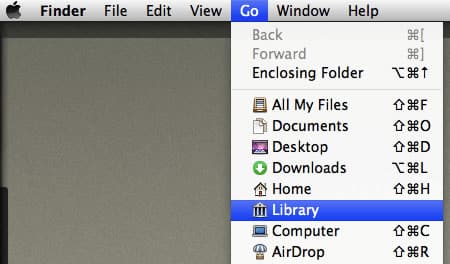
Step 2: Now go to Finder and then from menu bar at the top of your screen click on Go while pressing Option key. From drop down menu you should see Library folder on which you need to click on.
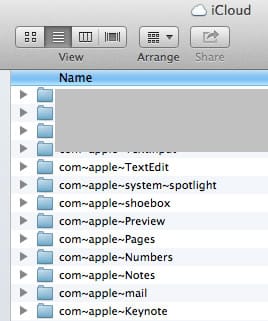
Step 3: Inside Library locate the folder with name Mobile Documents and open it. Inside him you should see a list of all folders for all applications which are installed on your Mac. Pay attention on folder that are starting with com~apple~ for example we will be using com~apple~Numbers.
Note: Numbers folder is used to store your spreadsheet files even those which you have created with Microsoft Excel.
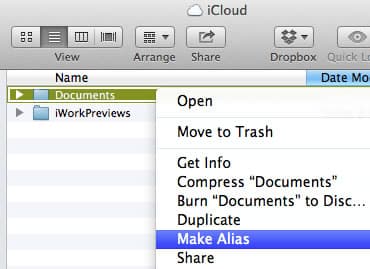
Step 4: Now open com~apple~Numbers folder and inside him you should have a folder with name Documents. Right mouse click on that folder and from context menu choose Make Alias option. By doing this you will create an alias of your Documents folder on the cloud for Numbers. You can now drag this folder anywhere you want.
Step 5: Repeat this process on any other Mac computer you have where you want to access your documents.
Step 6: Alias of folders represent a perfect mirror of original ones, which means that every change you mane in any of these two will show up inside other one. With this you can drag any spreadsheet file into this folder and it will show up on any other Mac where you have created its alias which is exactly the same you have with Dropbox.
Now you will most probably ask what we are gone do with media files such as music or videos since iCloud will not recognize or even show these formats. Well there is a simple workaround this which will help you to store even these type of files and in below steps you will see how.
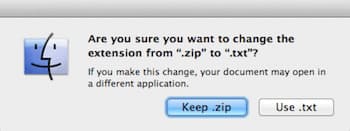
Step 1: Compress the file you want to store on your iCloud. Once its compressed, change extension of compressed file into .txt. If you get warning window make sure you choose Keep .zip button.
Step 2: Now open you web browser and go to iCloud.com website. Login into your account and then click on iWork icon.
Step 3: From here click on Pages tab located at the top of the window.
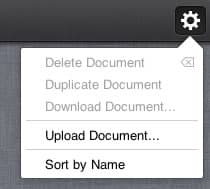
Step 4: Inside top right angle you should see white gear icon. Click on it and from context menu choose Upload Document.
Step 5: Select the file who’s extensions you changed to .txt and wait until its uploaded.
Step 6: Once file is uploaded you will be able to download it from any computer you want to, and by replacing its extension from .txt to original one you will be able to open its content.
Quite easy and convenient way to store your files and even media files on your iCloud storage account!
[ttjad keyword=”cloud-storage-drive”]


![Read more about the article [Tutorial] How To Automatically Extract MP3 From Audio CD – Windows Media Player](https://thetechjournal.com/wp-content/uploads/2012/11/rip-cd-audio-to-mp3-ttj-logo-512x179.jpg)
![Read more about the article [Review+Giveaway] iSkysoft Video Converter Ultimate](https://thetechjournal.com/wp-content/uploads/2013/12/scr_0-700x453-512x331.jpg)
![Read more about the article [Tutorial] How To Password Protect Or Encrypt Office 2007 Documents](https://thetechjournal.com/wp-content/uploads/2012/03/office-security-img1.jpg)