Thanks to Android, other Linux distributions are becoming more and more popular among users, but also with each new version their features are coming closer to their competitions such as Windows and Mac OS X. One of most popular Linux distribution is certainly Ubuntu, and today we have a chance to use newer version (Ubuntu 12.10). If you are completely new to this environment and you never used Linux before and you want to give it a try and test it, I will show you how to install Ubuntu 12.10 on your computer.
Before proceeding to below steps make sure you download Ubuntu 12.10 Desktop edition ISO image from this link. Once you download it, burn it to empty DVD or upload to your USB device. Once you DVD or USB device is ready proceed to below steps:
Step 1: Power On your computer and plugin your USB or insert DVD with Ubuntu 12.10.
Step 2: Press the necessary key on your keyboard to enter the BIOS. Generally, it is the Delete, F12 or Esc key.
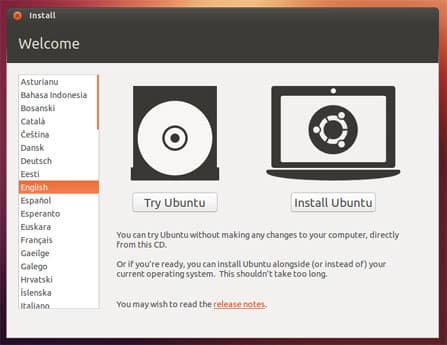
Step 3: Once you boot Ubuntu 12.10 from your USB or DVD you will see below screen. Choose whether you want to Try Ubuntu or Install Ubuntu, and also choose a language from left pane.
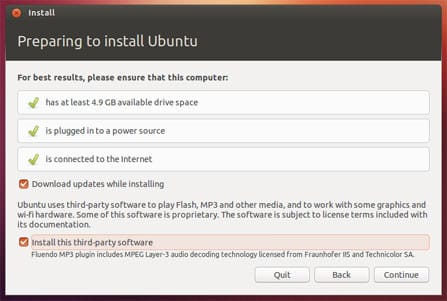
Step 4: In next window you need select checkbox’s in front of Download updates while installing and Install this third-party software. Click Continue.
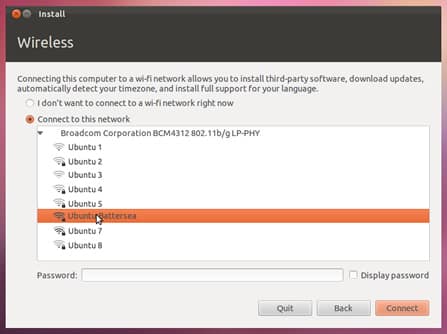
Step 5: Select Connect to this network. If you are not already connected to the internet, Ubuntu installer will ask you to select one of available WiFi networks. Make sure you select one, because it is advisable to be connected to the internet in order to receive latest Ubuntu updates. If a password is required, make sure you type it in inside Password field and then click Connect button.
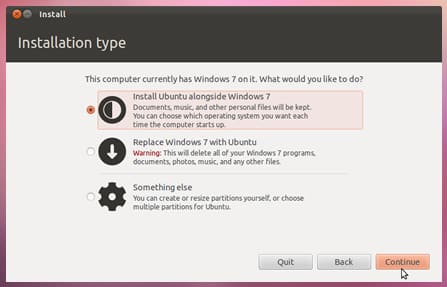
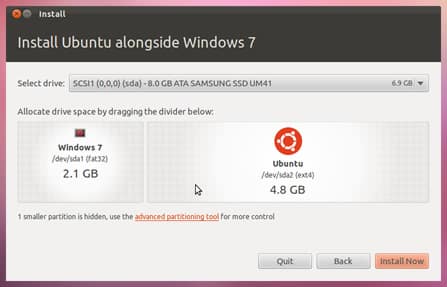
Step 6: Now use select box and choose whether you want to install your Ubuntu alongside another OS, replace Ubuntu with existing OS or if you are an advanced Ubuntu/Linux user yo can choose Something else. Click Continue button once you have selected desired option.
Step 7: From Select drive drop down menu select a drive where you want to install your Ubuntu 12.10 making sure drive have at least 4.5GB of free space. Click Install Now button to start the installation.
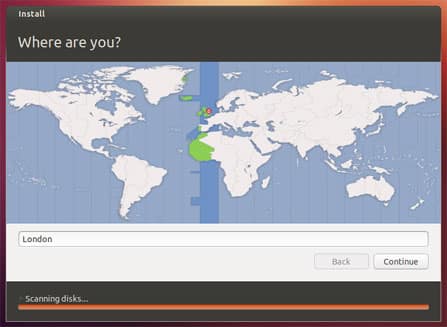
Step 8: In next window you need to select your location, however since you are already connected to the internet, this is done automatically, so all you have to do is click Continue.
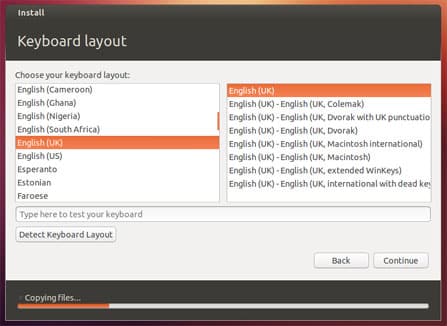
Step 9: Now you need to select preferred keyboard layout. If you are not quite sure which language option you need to choose for your keyboard, click on Detect Keyboard Layout button and then click Continue.
Step 10: Enter necessary login and password details and click Continue.
Step 11: The installation will now start. Wait for couple a minutes until its finished. Once its finished click Restart Now and you are ready to start testing new version of Ubuntu 12.10. Make sure you share your first impressions and opinions about this new version of Ubuntu using comment section below.
[ttjad keyword=”all-in-one-desktops”]


![Read more about the article [Tutorial] How To Setup And Use All Mouse Buttons In Windows](https://thetechjournal.com/wp-content/uploads/2012/10/mouse-buttons-setup-ttj-logo-512x261.jpg)
![Read more about the article [Tutorial] How To Add Vertical Mozilla Firefox Bookmarks Bar](https://thetechjournal.com/wp-content/uploads/2012/05/ff-option-addons.jpg)
