Want to completely unroot your Android device, but don’t know the process? We will show you the easiest way so that you can successfully complete the unroot process.

In Android, the “root” word is very familiar to us. Your curious mind wanted to know what a rooted phone can do and you had rooted it. You might have gotten the most powerful apps and utilities. Now, you might be thinking that it was such a mess. Along with rooting, you have voided the warranty of your Android device.
It is possible that you have decided to rollback your device. So you have to unroot it. In this tutorial, we will show you how to completely unroot your device. To get started see the methods below:
Note: There are several ways and methods to unroot android devices. It depends on different android versions and which device are you using. But we will show you the easiest method. If you fail then you can use the manual method.
Uninstall SuperSU
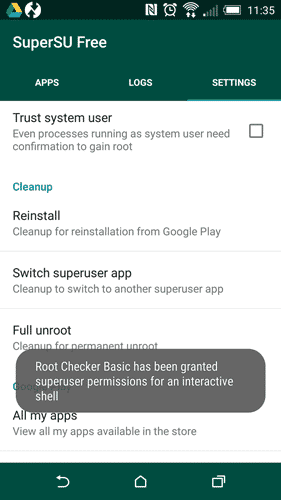
If you rooted your android device with SuperSU, you have to Uninstall SuperSU. This process is very easy.
Go to SuperSU App > Settings > now tap on Full Unroot > Select Continue
That’s all. Now your device will be rebooting. After that, you will notice that SuperSU has gone. So you have successfully unrooted.

Uninstall SuperSU Manually
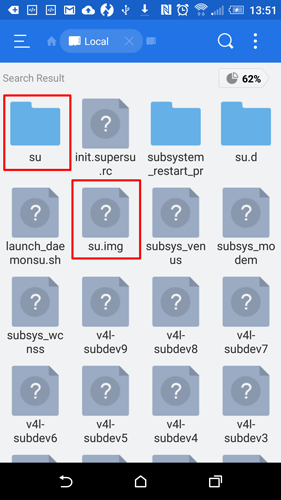
If your device is rebooting continuously after doing the first method, then you need to manually uninstall SuperSU. First, you have to install ES File Explorer. You can install it from here.
Open the app and approve root permission to this app. Go to the root directory (/). Now, search for a file named “su”. It could be found in the “system” folder. Delete all files named “su”.
Then search again named “superuser.apk”. After finding that file, delete it. That’s all.
Important Note: Be careful!! If you delete any other files, it will brick your phone. Do it at your own risk. Just delete what we are saying to delete.
If the above methods fail, there is still hope so don’t worry! However, the alternative method is very complex. You will found it from here.


![Read more about the article [Tutorial] How To Synchronize Your Hotmail And Outlook With Android](https://thetechjournal.com/wp-content/uploads/2012/10/hotmail-outlook-to-android-mail-sync-ttj-logo-512x219.jpg)
![Read more about the article [Tutorial] How To Share A YouTube Playlist](https://thetechjournal.com/wp-content/uploads/2012/04/eminem-search-field-512x98.jpg)
![Read more about the article [Tutorial] How To Improve Samsung Galaxy S III Camera With Camera HX Mod](https://thetechjournal.com/wp-content/uploads/2012/10/sgs3-ttj-logo-4a5s64d65a4s.jpg)