In one of my previous tutorials I showed you how to extract/download all images from a website at once. Today I will show you how to perform this same operation but this time in any Office document. This procedure requires some third-party tool and it will work in Office 2007 and higher.
To get started follow steps below
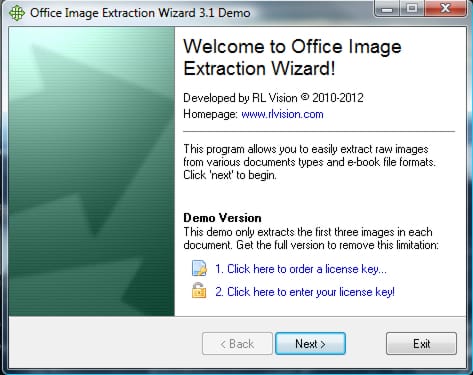
Step 1: First we need to download Office Image Extraction Wizard Portable from this link and install it on computer where you have your Microsoft Office 2007 or higher.
Step 2: Start the application and in first window that shows up click on Next button.
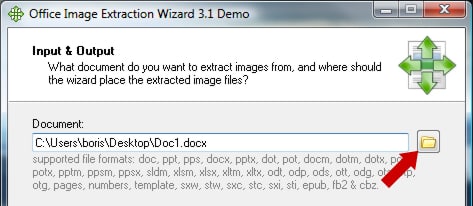
Step 3: Now click on folder icon next to Documents field and select your Office document from which you want to extract all images at once.
Step 4: Make sure that checkbox in front of Create a folder here is selected in order to add your extracted images in new folder.
Step 5: If you are extracting images from multiple office documents at once make sure that the checkbox in front of Batch Mode is selected, otherwise leave it un-selected.
Step 6: If you are not satisfied with the output folder location for your images click on folder icon next to Output folder field and choose a new location
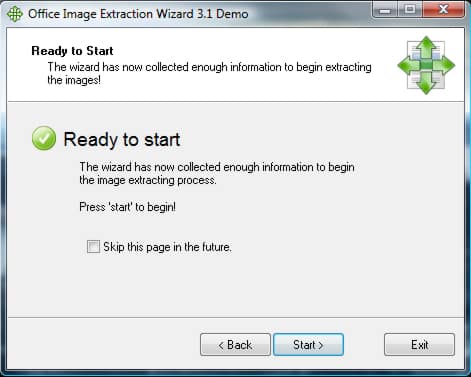
Step 7: Once you have done with previous steps click on Next.
Step 8: Now in new window click Start and wait until all images all extracted.
You are done! Check your output folder and all images from your Office document will be located in there.


![Read more about the article [Tutorial] How To Enable/Disable Store On Windows To Go Workspaces In Windows 8](https://thetechjournal.com/wp-content/uploads/2012/11/enable-disable-a65s4d89ew7r9we.jpg)
![Read more about the article [Tutorial] How To Repair Windows 7 Boot](https://thetechjournal.com/wp-content/uploads/2012/02/starting-windows-7-512x284.jpg)
![Read more about the article [Tutorial] How To Enable Voice Dictation On New iPad](https://thetechjournal.com/wp-content/uploads/2012/03/ios-5-voice-512x219.jpg)