To save time when you are installing new Windows 7 because of a system crash or because you bought a new computer, you can create your own bootable Windows 7 DVD which will include Service Pack 1. By doing this you will speed up Window installation because Service Pack 1 will automatically be installed along with Windows. Many people don’t bother even installing Service Pack but remember that Service Pack (SP1) for Windows 7 includes all the latest patches and updates for the system and it is very essential to have it installed. In this tutorial I will guide you trough all steps you need to make and in order to merger Windows 7 and Windows 7 Service Pack 1 installation.
To make this process possible you will need to download two things before continue to follow below steps. First download Windows 7 Service Pack 1 on your computer from this links. Next download RT Seven Lite from this link and install it on your computer. While having both things downloaded and installed continue following below steps.
Step 1: Start RT Lite Seven by double clicking on its icon on the desktop or Start menu.
Step 2: Click the Browse button and then you have select Select OS path if you have Windows 7 on a DVD or USB drive or select Select ISO File if you have a Windows 7 disk image.
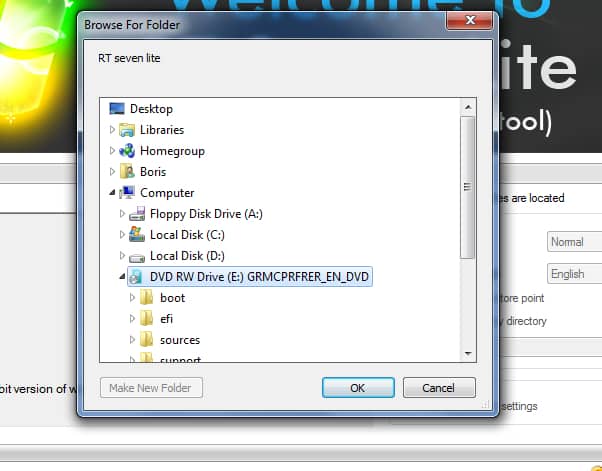
Step 3: Locate the Windows 7 on your computer and click OK
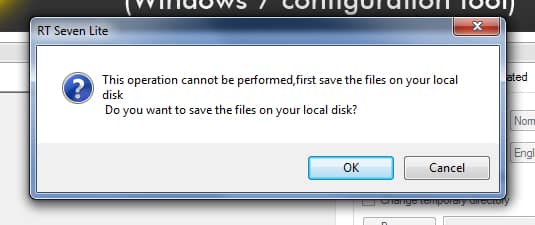
Step 4: In pop up window that show up click OK to copy the DVD files on your hard drive.
Step 5: Now inside new popup window go to location where you want to upload your Windows 7, click on Make New Folder button and name it as you wish
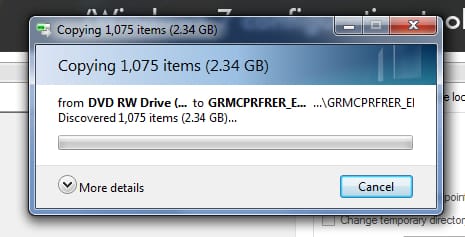
Step 6: The files are then copied to your hard drive which may take a few minutes.
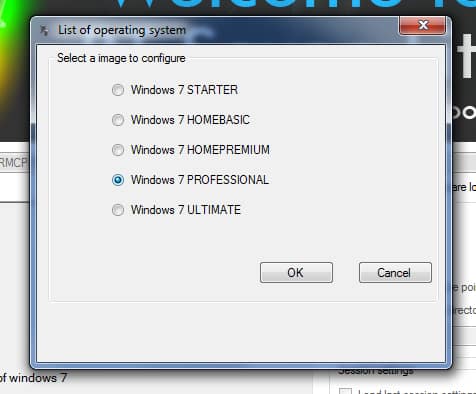
Step 7: In the window that opens, select your Windows 7 edition and click OK. Note that if there is the option Slipstream Service Pack make sure it is checked before pressing OK button.
Step 8: Wait for few minutes and in the window that opens, click the Browse button.
Step 9: On your hard drive select Service Pack 1 you downloaded at the beginning of this tutorial and then click Start button. This may take several tens of minutes.
Step 10: Then click Proceed.
Step 11: Once the integration process is completed you are good to go.
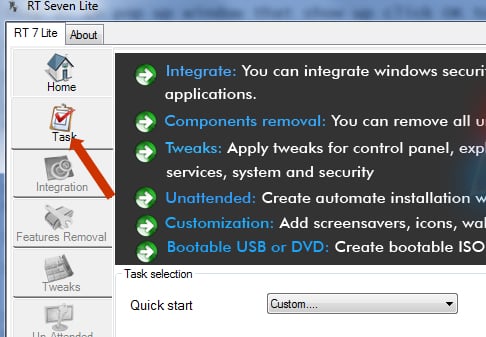
Step 12: Now when our Windows 7 is integrated with Service Pack 1 we need to burn it on DVD or upload to USB to be able to install it when necessary. For this click the Task section.
Step 13: Check the box ISO Bootable and then click the ISO-Bootable section
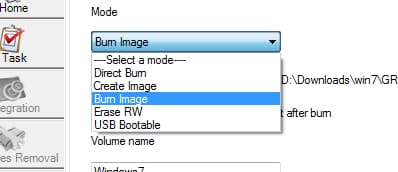
Step 14: Under list Select a mode choose Create Image to create an image in ISO format
Step 15: Then from bottom right click the Make ISO button.
Step 16: Choose a folder on your hard drive where to add the image and click Save.
Step 17: Wait for up to 5 minutes and once its finished click OK.
Step 18: Now again under the drop down menu you used in Step 14 choose Burn Image to burn Windows 7 with SP1 on a DVD or select USB Bootable to add Windows 7 with SP1 on a USB Drive
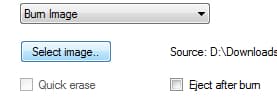
Step 19: If the image we create few minutes ago is not selected click on Select Image button and locate that ISO image file
Step 20: Select the ISO image and click Open.
Step 21: Now depending which method your chooses in Step 18 insert blank DVD or USB drive and from bottom right click the button Burn. Once its finished click Finish button.
[ttjad keyword=”microsoft”]





![Read more about the article How to Remove the Background of a Photo With One Click Using Remove.bg [FREE]](https://thetechjournal.com/wp-content/uploads/2018/12/TheTechJournal-Remove.bg_-512x338.png)
![Read more about the article [Tutorial] How To Change Windows 8 Lock Screen Background Image And Apps](https://thetechjournal.com/wp-content/uploads/2012/08/personalize-pc-settings-as5d46gs564dsf-512x213.jpg)
![Read more about the article [Tutorial] How to Create Password Reset Disk In Windows 7](https://thetechjournal.com/wp-content/uploads/2012/04/password-reset.jpg)
the beginning of this tutorial and then click Start button. This may take several tens of minutes.
http://www.metropolitanmovers.ca