If your hard drive or USB drive is full of files and folders and it’s hard and time consuming for you to go trough each of them one by one and check which one is empty, you can use a free tool for Windows called Remove Empty Directories and quickly locate all of them. In this tutorial I will show you how to use this tool, locate all empty folders and remove them with just few mouse clicks.
If you don’t have Remove Empty Directories app on your computer download it from this link. Once download process is completed simply double click on downloaded file and install the app on your computer. Once installation is finished continue following steps below
Setup The Application
Step 1: Start the Remove Empty Directories app from your desktop or start menu and when new windows open choose Settings tab.
Step 2: In here you need to make sure all settings are adjusted by your needs. These are the changes I made
Step 3: Under Delete mode drop down menu select Delete to recycle Bin. By choosing this option you can later open your Recycle Bin and review which folders are removed and in case some of folder which you want to keep are in here you can easily restore them back
Step 4: Now make sure that option Directories with files that are 0 KB count as empty. This will make sure that all folders which are 0 KB in size will be deleted which is completely logical since they are empty
Step 5: Next check the field Detect paths in the clipboard
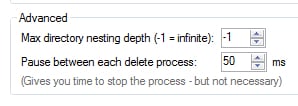
Step 6: Now move all the way to the bottom of the window and under Advanced section decrease the time between each delete process to 50ms
Step 7: Also under Infinite-loop detection: Stop after decrease to 5 errors
Start The Scan
Now that we have adjusted all settings it’s time to start the scan.
Step 1: Choose the Scan tab
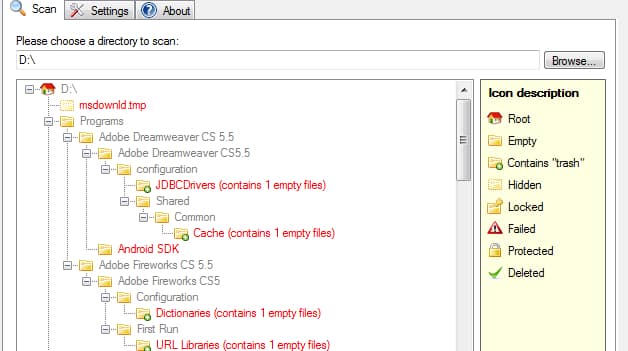
Step 2: Click Browse button and select a directory which you want to scan. In my case I choose entire D: partition
Step 3: Click on Scan folder button located at bottom left and wait until scan is completed
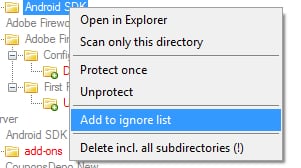
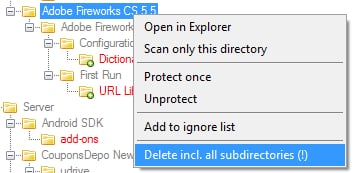
Step 4: When it’s finished you will probably see many folders listed. Those with red text color will be deleted, however if you don’t want to delete that folder, right mouse click on it’s name and from context menu choose Add to ignore list
Step 5: Those folders with gray text color will be ignored. If you wish to marked the for deletion right mouse click on then and from context menu choose Delete incl. all subcategories!
Step 6: As your last step click Delete folders button and all folders marked with red color will be removed from your hard drive.
You are done! You can repeat this process for nay other hard drive or partition in your computer and get rid of those unnecessary folders. Also if you have any opinions regarding this great free tool leave it in comment section below.
[ttjad keyword=”all-in-one-desktops”]






![Read more about the article [Mode Story] Must Know Android Tricks If You Got A New Device](https://thetechjournal.com/wp-content/uploads/2015/07/Screenshot-2015-07-28-02.37.35-512x243.png)
![Read more about the article [Tutorial] How To Organize Multiple Inboxes In Gmail](https://thetechjournal.com/wp-content/uploads/2012/03/gear-icon.jpg)
![Read more about the article [Tutorial] How To Make Mozilla Firefox Address Bar Transparent](https://thetechjournal.com/wp-content/uploads/2012/05/first-folder-ff-512x133.jpg)