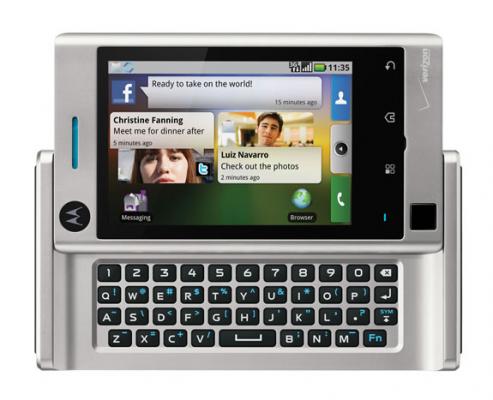
Besides the rooting of the Motorola Droid X,Android hackers to take a personal motive to hack other Motorola devices.The Motorola Devour is the latest device to fall victim to the cause.
The Android Central forum member bitswitch, has successfully rooted the Motorola Devour using some helpful tips from the Droid X rooting method and some files found around the community.
Note:This may vary from mileage to mileage.
*Tip* –> (Run means type the command in quotes [but not the quotes] then press the Enter key)
Step 1: Download the attached archive and expand it to a folder you can find (eg. c:\devour_root)
Step 2: Set up ADB (You’ll need to google this part)
Step 3: On the phone: Home, Menu Button, Settings, Applications, Development: Make sure the “USB debugging” option is enabled/checked.
Step 4: Status bar, USB connection: Make sure “PC Mode” is selected.
Step 5: Open a command prompt (Windows: Start, Run, “cmd”, OK; Linux: Terminal)
Step 6: Run “adb devices”. If you don’t see your device listed under “List of devices attached”, return to step 2 and follow the link to setup ADB (use that topic for support) and return here when “adb devices” lists your X.
Step 7: Run “CD c:\devour_root” (or where ever you expanded the archive)
Step 8: Run “adb push Superuser.apk /sdcard/Superuser.apk”
Step 9: Run “adb push su /sdcard/su”
Step 10: Run “adb push busybox /sdcard/busybox”
Step 11: Run “adb push exploid /sqlite_stmt_journals/exploid”
Step 12: Run “adb shell”
Step 13: Run “cd sqlite_stmt_journals”
Step 14: Run “chmod 755 exploid”
Step 15: On your phone, navigate to a screen where you can switch wifi/bluetooth on/off easily (settings, or a home screen with a widget)
Step 16: IMMEDIATELY after executing the next step, toggle wifi or bluetooth off and back on
Step 17: Run “./exploid” and follow directions on screen. Once this completes you’ll be back at a shell prompt.
Step 18: Run “rootshell”. You’ll be prompted for a password.
Step 19: Type in password “secretlol” and press Enter then you are root! (You’ll know because your prompt will now be a “#” instead of “$”)
Step 20: Run “mount -o rw,remount -t yaffs2 /dev/block/mtdblock3 /system”
Step 21: Run “busybox cp /sdcard/Superuser.apk /system/app/Superuser.apk”
Step 22: Run “busybox cp /sdcard/su /system/bin/su”
Step 23: Run “busybox cp /sdcard/busybox /system/bin/busybox”
Step 24: Run “chmod 4755 /system/bin/su”
Step 25: Run “chmod 4755 /system/bin/busybox”
Step 26: Run “rm /system/bin/rootshell”
Step 27: Run “exit” to drop from root to a non-root user shell (on phone still)
Step 28: Run “exit” to drop back to your machine command prompt (instead of phone)
Confirm root is established by:
* Run “adb shell”
* Run “su” (now you should see the # sign which indicates you are root)
* Watch your screen so you can allow Superuser root access.
“You’re done! feel free to kill the bloat apps and such.
Thanks


![Read more about the article MWC 2012 – The World’s Fastest Smartphone, Ascend D Quad, Is Here [Hands-On Pictures]](https://thetechjournal.com/wp-content/uploads/2012/02/ascend-512x384.jpg)
![Read more about the article Windows Phone 7 To Bring a Revolution[Video]](https://thetechjournal.com/wp-content/uploads/2010/09/10x0906ib23ewfdwindows-300x190.jpg)
So where is the Attachment needed to root the Devour??
So where is the Attachment needed to root the Devour??
i’m having a problem on step 14. chmod 755 exploid
unable to chmod exploid: no such file or directory …?
Same here where’s the attachment
You can find the file on the androidcentral forums.
http://forum.androidcentral.com/motorola-devour-rooting-roms-hacks/24702-we-can-have-devour-root-now-instructions-inside-xd.html
Either I’m supid and couldn’t find it on that link or they wiped it out. I just spent 30min looking looking for that file that’s MIA… or I’m just that bad at finding things
Can I use other network sim ones it is unlockeD??