Every time you creating new account in Windows 7 or Windows Vista and protecting it with password it is very important to setup a password recovery disk. If it happens to you to forget your login password, especially if you are using a lot of characters and you can login, you can easily use your password recovery disk to reset and add new login password. In this tutorial I will show you which steps you need to take and order to create your Windows recovery disk.
To get started follow steps below
Step 1: Plug-in your USB drive into computer on which you want to setup a password reset disk
Step 2: When you USB drive is recognized go to Start menu, inside search field type password reset and from search result open Create a password reset disk
Step 3: When new window open click Next
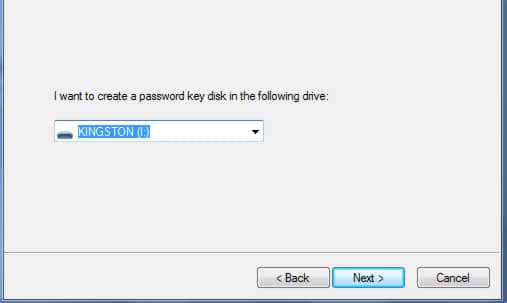
Step 4: Now from dropdown menu select your USB drive and click Next
Step 5: Type you current password you use to login into Windows and click Next
Step 6: Wait for few seconds while password reset disk is created and then click Next and Finish
Now once we have successfully created out password reset disk lets se how to use it in case we forget or lose our windows login password
Step 1: On Windows login screen click on Reset password… link which will start a Windows password reset wizard
Step 2: Make sure your USB drive is plugged in and from dropdown menu choose your USB Drive and click Next
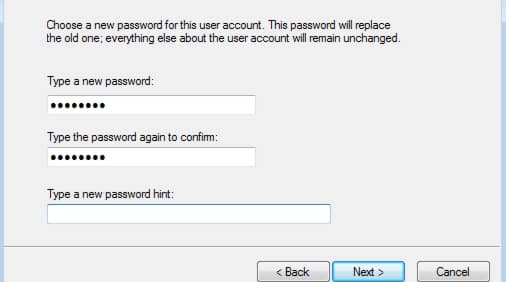
Step 3: Now enter a new password, confirm it, create new hint in case you forget your password again, click Next and then Finish
Step 4: Now Enter your new password and login into Windows.
[ttjad keyword=”all-in-one-desktops”]


![Read more about the article [Tutorial] How To Download A Copy Of All Your Emails](https://thetechjournal.com/wp-content/uploads/2012/07/mail-offline-ttj-logo-512x211.jpg)
![Read more about the article [Tutorial] How To Enable .NET Framework 2.0 And 3.5 In Microsoft Windows 8](https://thetechjournal.com/wp-content/uploads/2012/08/select-net-framework-check-box-as5d4a65s4d.jpg)
![Read more about the article [Tutorial] How To Print From Your Nexus 7](https://thetechjournal.com/wp-content/uploads/2012/07/cloud-print-action-as8d7a6sd32.jpg)