When you buy a new Android mobile, generally the internet settings is updated automatically in most of the cases. The Android device sets it on its own from the network provider. But sometimes it happens that the device can not recognize the network information and so that it cannot set the Internet. For internet settings you have to put APN name. Here is the tutorial about how to setup Internet settings on Android device.
For different network provider the APN is different. Each carrier has different information like the web address, username, password and more which has to be filled up in the Android device to allow that device to access to the Internet. So if your Android mobile does not set it automatically or properly, you have to set it manually.
You can get our APN from the respective service provider through call center or their web sites. Here are the steps below. I used LG G3 S Android Smartphone for this tutorial. You can use any Android mobile you like. The steps might be little different for different manufacturers but the basic approach should be same.
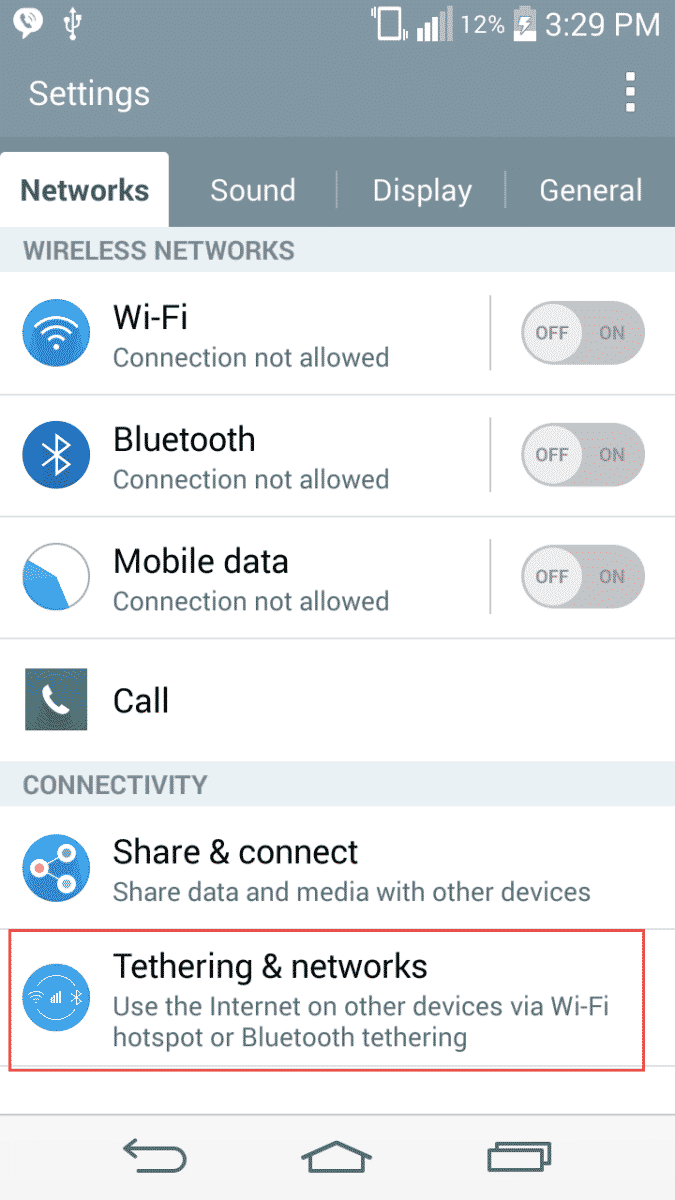
Step 1: Go to “Settings” Option.
Step 2: Tap on “Tethering & networks” or “More Networks” or similar option under connections/networks etc. for different Smartphones.
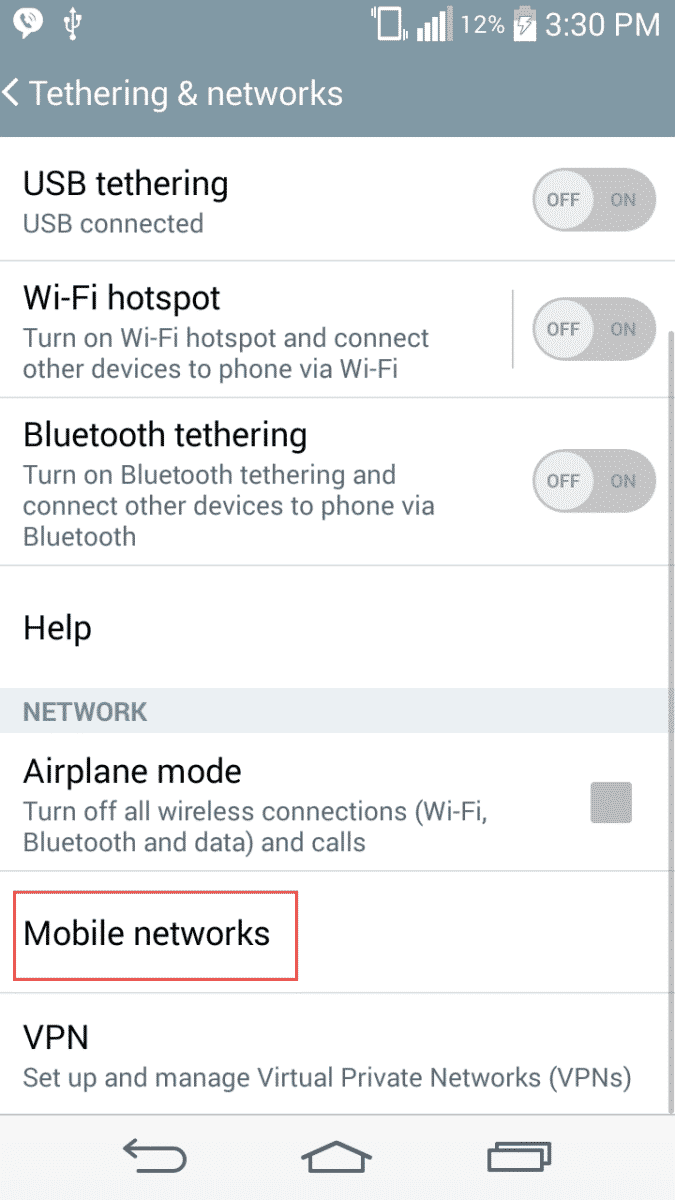
Step 3: Go to “Mobile Networks” Option.
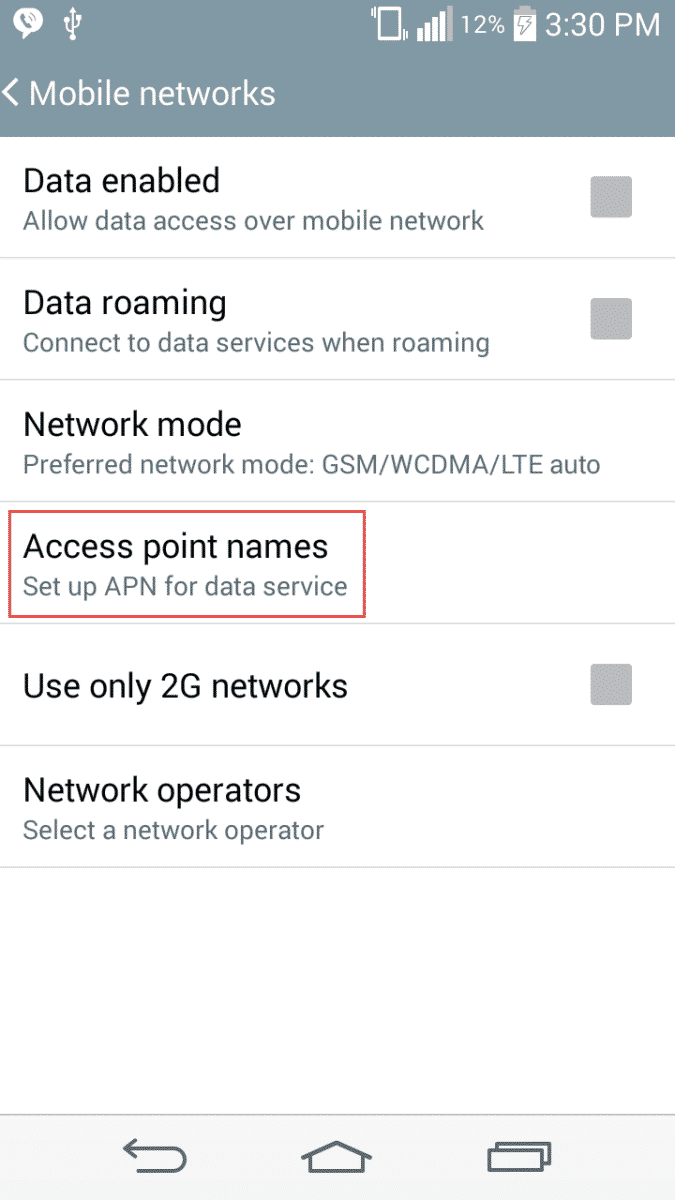
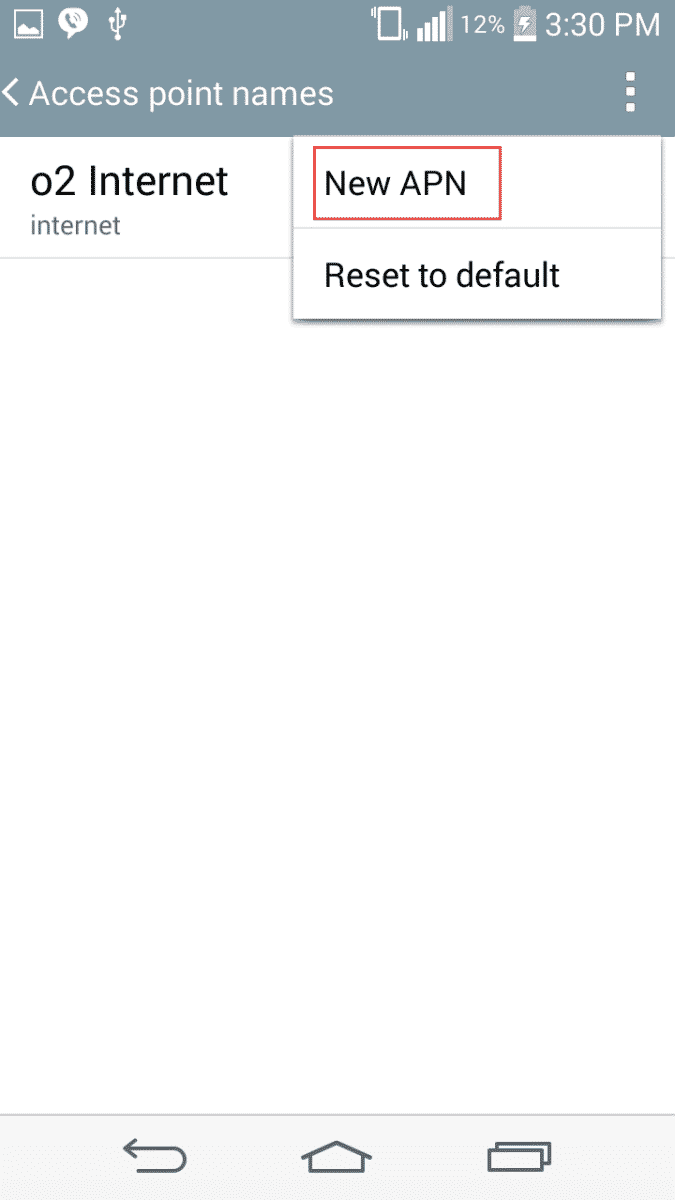
Step 4: Under “Mobile Networks”, you will find “Access point names”.
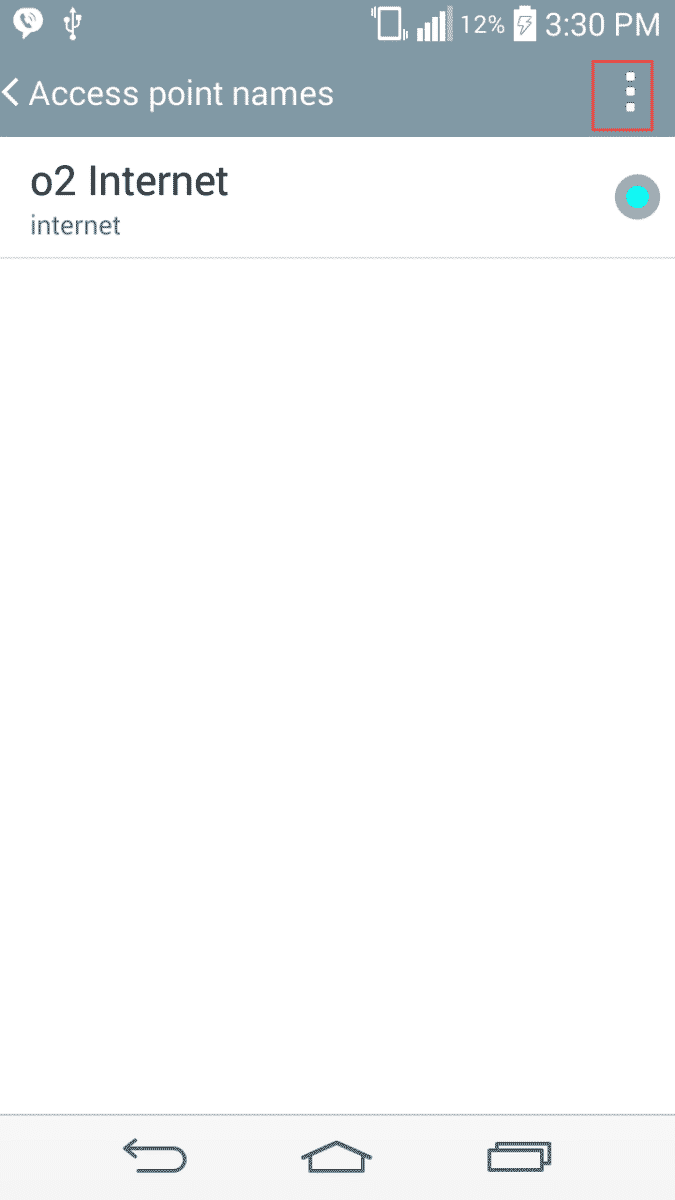
Step 5: Tap on Menu, you will find “New APN”.
Step 6: Tap on “New APN”.
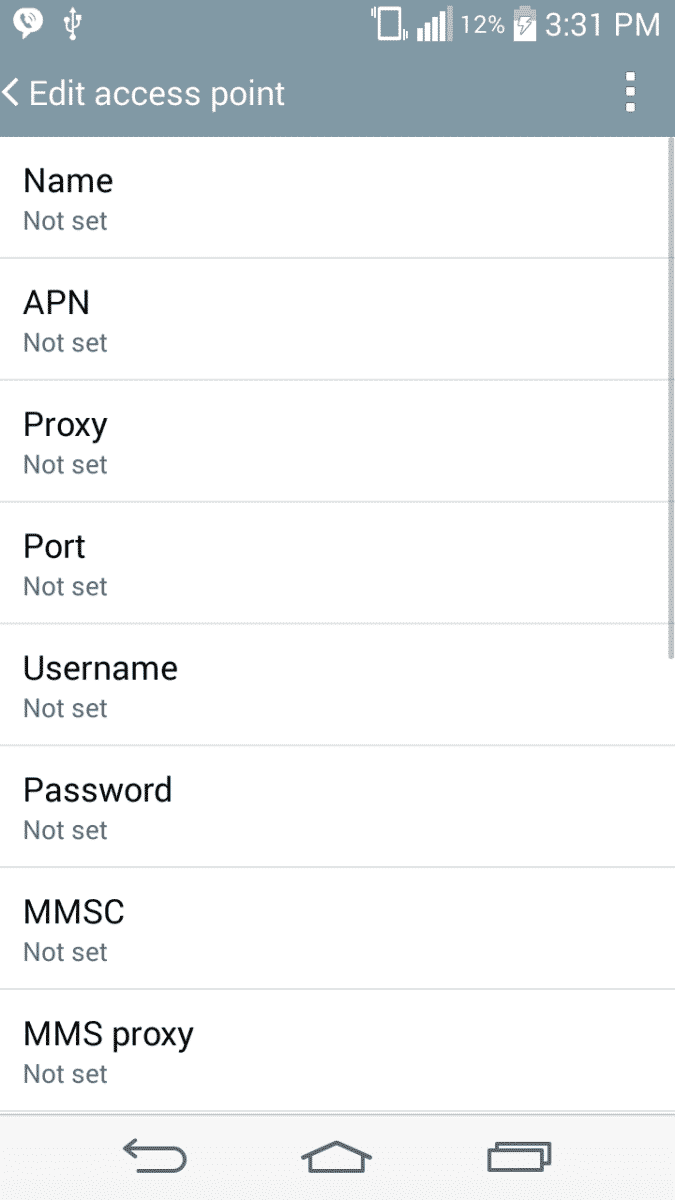
Step 7: Now enter all the information regarding APN of the carrier.
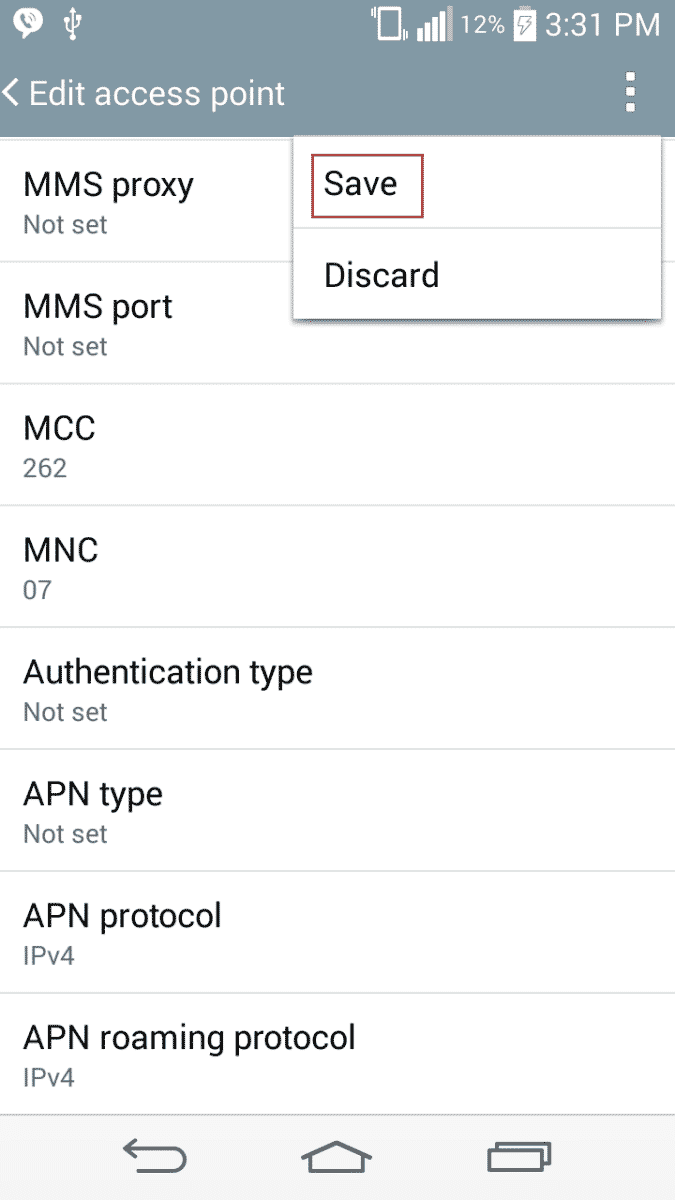
Step 8: After filling up, tap the menu button and tap Save.
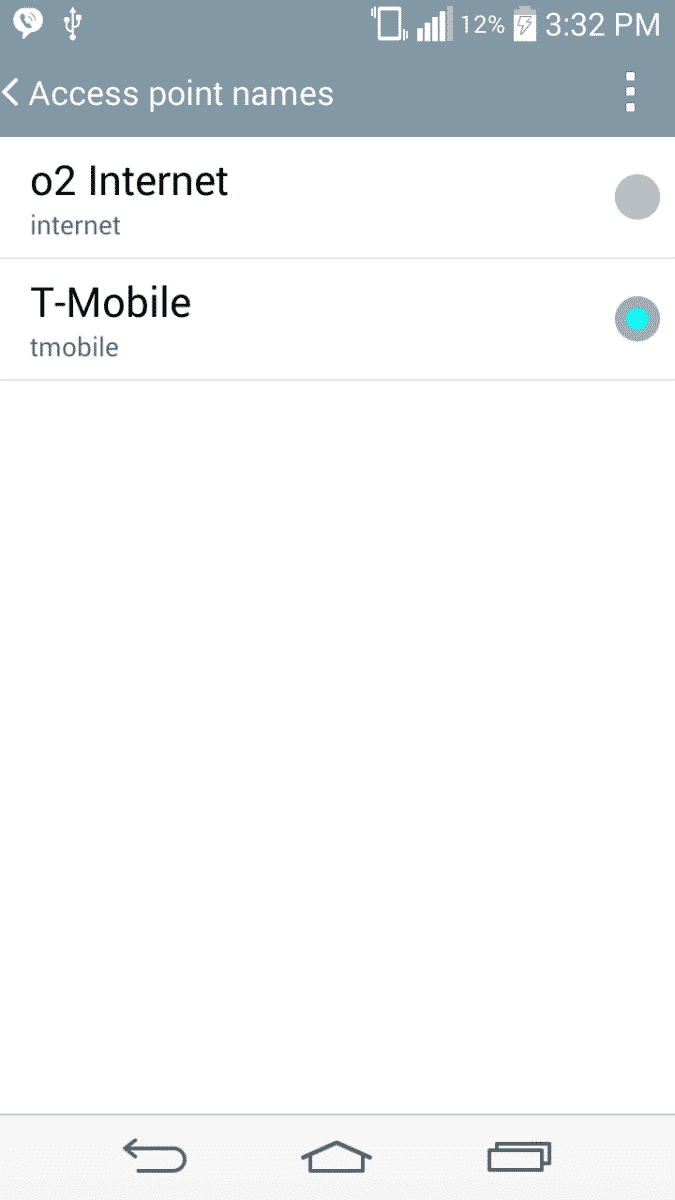
Step 9: New APN is set and select that APN (here T-Mobile is the new APN).
Let us know in comments if you find this guide helpful!
[ttjad keyword=”android-phone”]



![Read more about the article [Tutorial] Set Custom Ringtones For Each Skype Contacts On Android](https://thetechjournal.com/wp-content/uploads/2015/09/skype1-512x382.png)
![Read more about the article [Tutorial] How To Change Action Related To Windows 7/Vista Power Button](https://thetechjournal.com/wp-content/uploads/2012/02/windows-power-button-change-512x230.jpg)
![Read more about the article [Tutorial] How To Change Keyboard On Android](https://thetechjournal.com/wp-content/uploads/2015/01/CKA_1-432x768.png)
H